Rolling Wardrobe Rack DIY

OK. So I have a ridiculous amount of clothing. So much it actually scares my husband. So much we can't share a closet.
Recently we moved into a new home, and while almost everything about our new space is an upgrade, the closets are teeny tiny. The morning I started unpacking my clothes it became glaringly obvious I would need to create a system for storing and easily accessing my hoards of clothing. I'm lucky to have a 'cloffice' (part closet, part office) so spreading my things out in one room would work. Rather than making built in closet systems throughout the entire room (ugly!) I made a rolling wardrobe rack that would be both functional and stylish.

Here's how I did it!
Shopping List
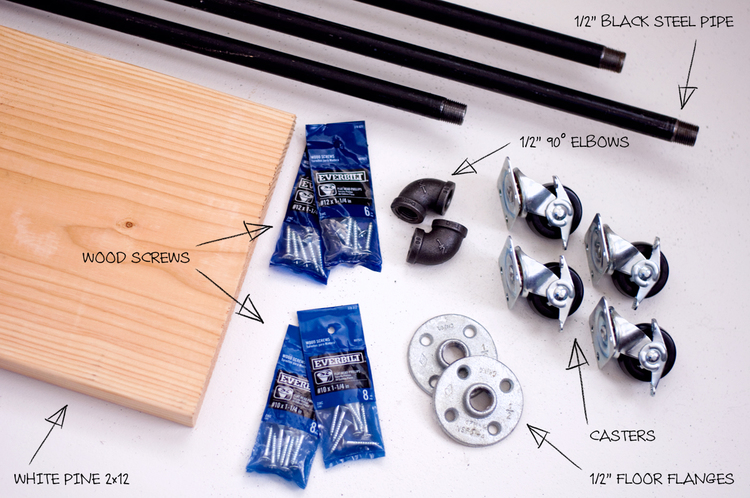
Steel Pipe - I chose standards sizes of steel pipe for this project (waiting for a hardware store staffer to cut and thread customized sizes can take a very long time). I used three 1/2" 60" steel gas pipes (2 for the legs, 1 for the rack), threaded on both ends.
Elbows - Two 1/2" 90 degree elbows to connect the rack to the legs.
Flanges - Two 1/2" floor flanges to connect the rack to the base.
White Pine 2x12 - Needed is a 2x12 long enough to accommodate the 60" rack and to allow for the extra length of the elbows and any outward tension exerted upon assembly - an extra 6" ought to do it, making the total needed length 66". The smallest length 2x12 Home Depot sells is 8' so I'll have a lumber staffer make this cut for me. TIP: When choosing a piece of lumber assess the ends to determine which piece was cut from the center of the tree - they are less likely to warp and bend. Additionally, try to find the lightest pieces - they've cured and will resist warping.
Casters - I chose four locking casters.
Wood Screws - I chose two different screw types. #12 1 1/4" wood screws to secure the flange - this size allows the screw to sit flush (or 'counter sunk') against the flange. #10 1 1/4" wood screws to secure the casters. TIP: The '#' of a screw describes the diameter of the head - The 'inch' describes the length of the screw.
Other Materials Needed
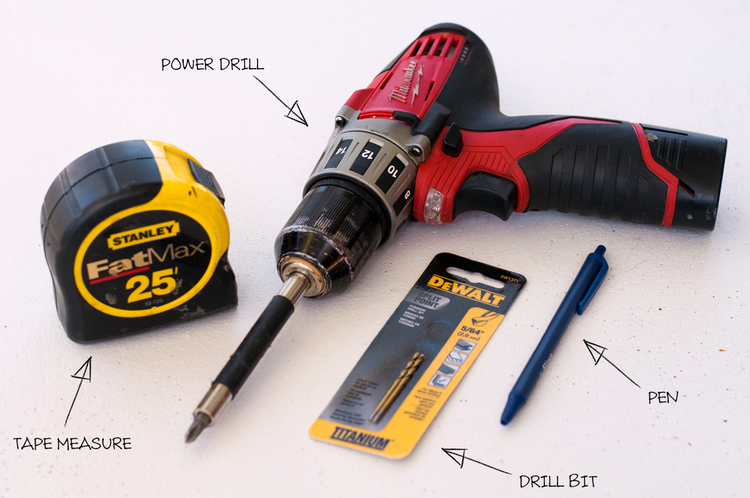
Power Drill
5/64" Drill Bit - For the pilot holes. TIP: Pilot holes are small (in diameter) holes made prior to screwing that allow the screw to penetrate the wood with more ease. Trying to accurately screw into hardwood without pilot holes is very difficult, especially for beginner carpenters.
#2 Phillips Tip Drill Bit - To secure the screws.
Tape Measure
Pen
Directions:
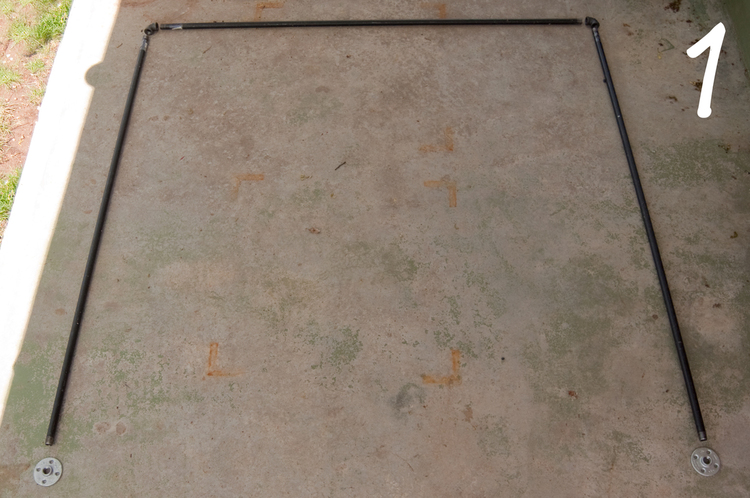
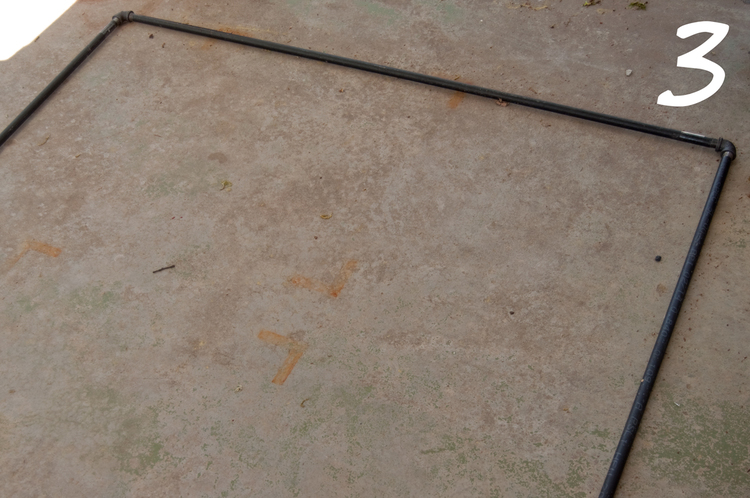
1: Wipe down all steel pieces and lay them out to begin assembly of the rack. 2: Connect the 90 degree elbows to the top piece of pipe. 3: Connect the next two pieces of pipe to the 90 degree elbows.
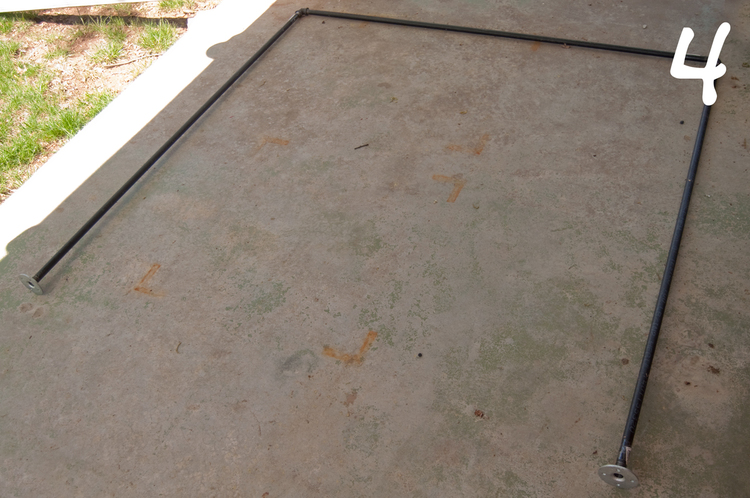
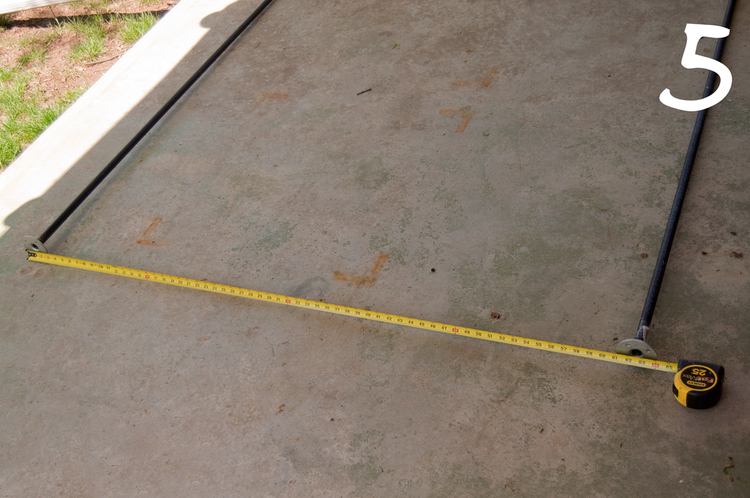

4: Connect the flanges to the ends of the pipe. 5: Pull the legs taught and measure the distance from the outside edges of the flanges. 6: The total distance measured is 64". The 2X12 that makes up the base is 66" - we have a surplus of 2" which tells us the flanges should be positioned 1" from the edges of the 2X12.


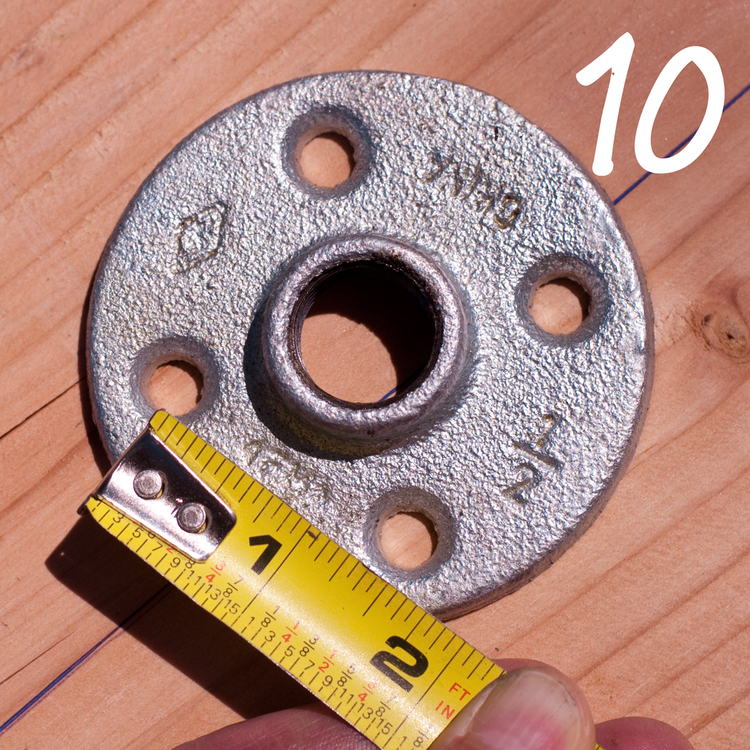
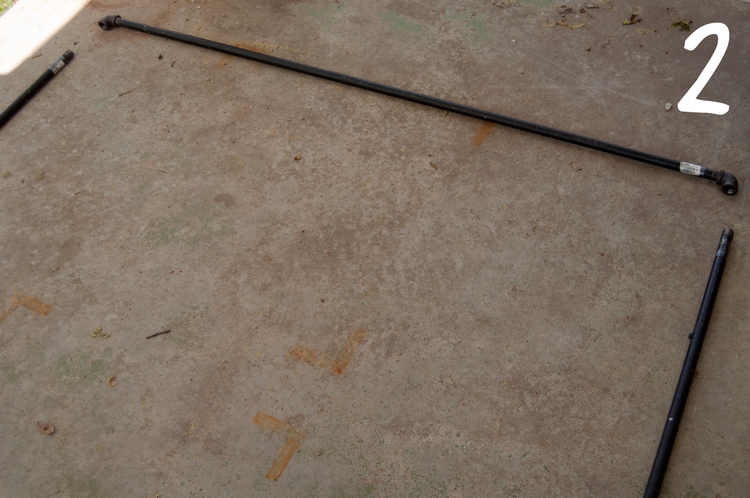
7: Remove one flange from the pipe - we'll need it as a guide. 8: Identify 1" from the edge of the 2X12 and mark center line. 9: Extend the center line 6". 10: Measure the distance from the center of the mounting holes on the flange. I measure 1-1/2".
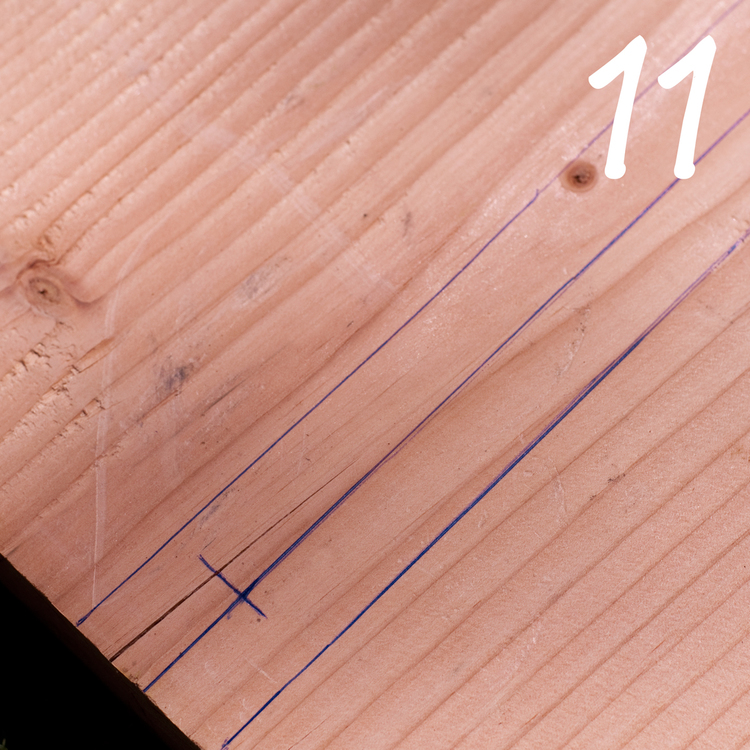


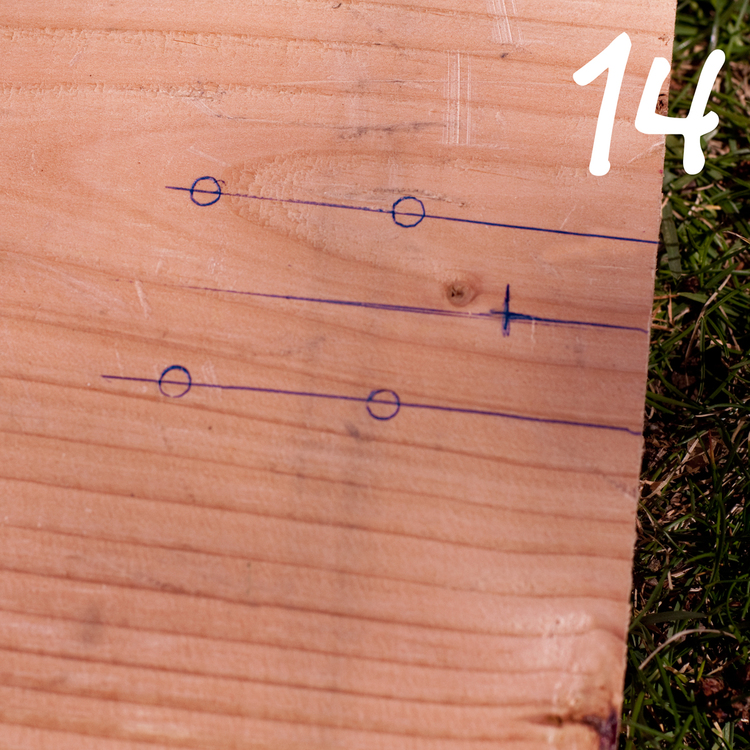
11: Extend two 6" lines 1.5" from each other centering on the center line. 12 & 13: Lay the flange 1" from the edge of the 2X12 so that the three lines run down the center of all flange holes. Mark the holes. 14: Repeat steps 8-13 on the other side of the 2X12. These holes will be our guides for placing and adhering the rack.

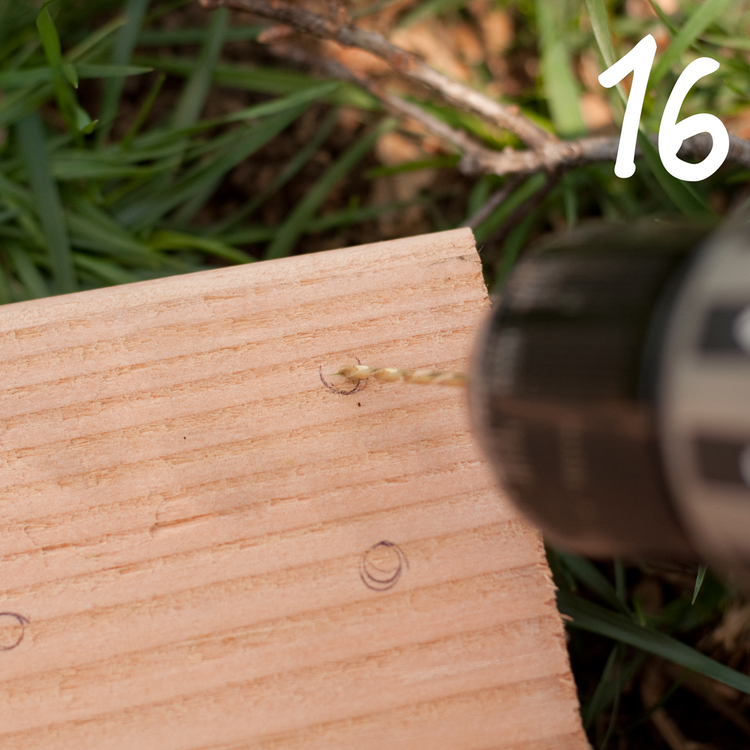
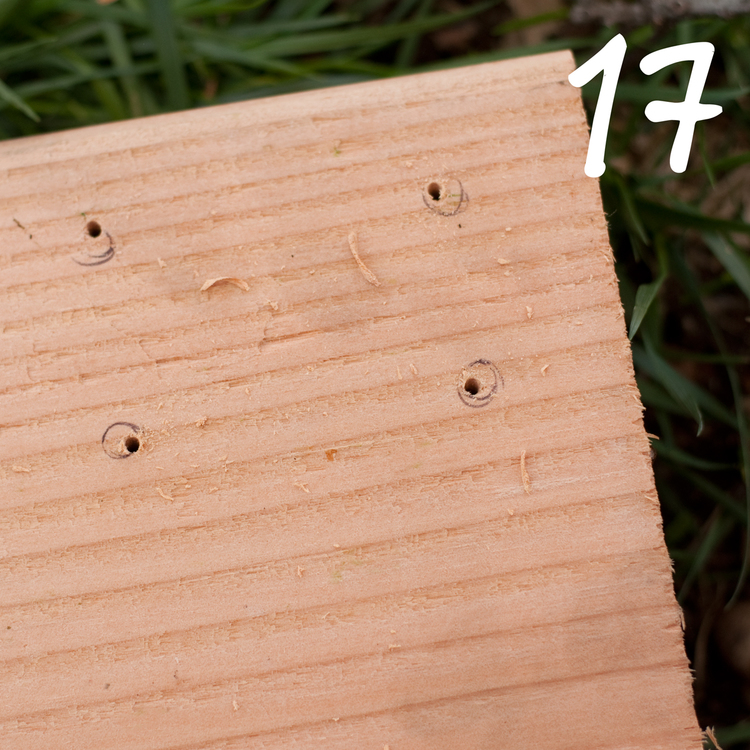

15: Flip the 2X12 over and place a rolling caster in the corner. The closer the caster is to the edge, the more likely the 2X12 is to split when we screw it in. 1/2" to 3/4" from the edge is ideal. 16, 17, & 18: Mark the holes, remove the caster, and prepare to make pilot holes. Drill the pilot holes. Ready the screws.

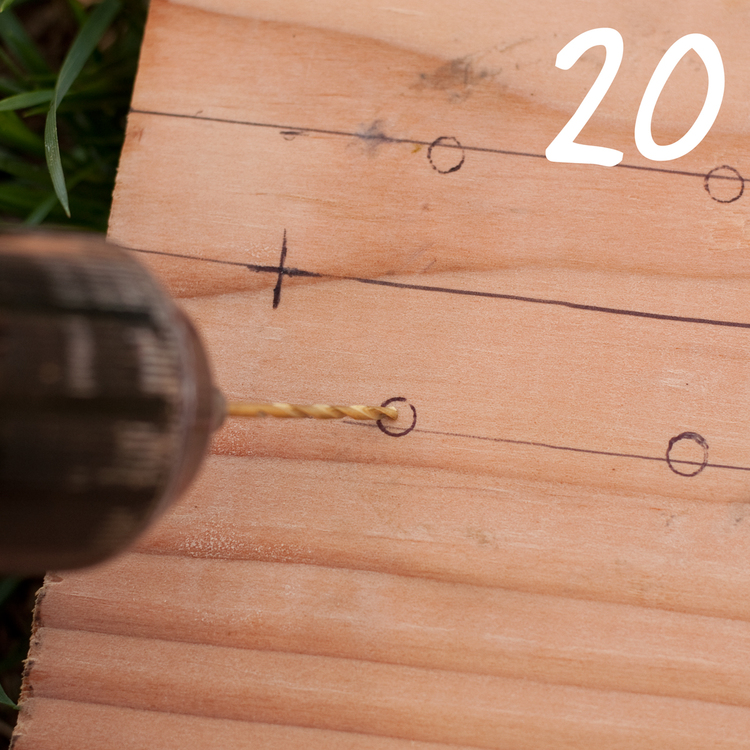
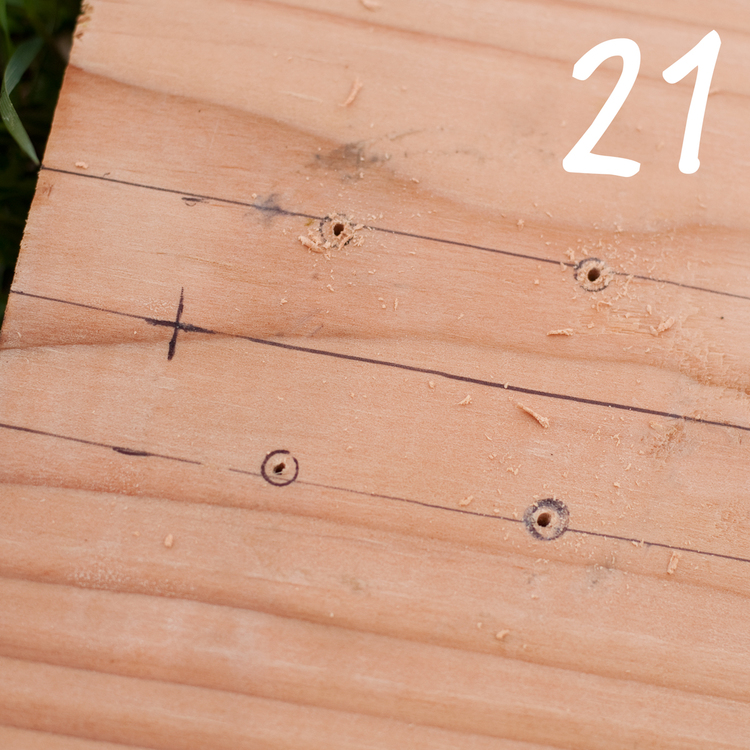

19: Place the caster over the guides and screw directly in to the pilot holes. Secure the remaining three casters in the remaining three corners using steps 16-19. 20, 21, & 22: Flip the 2X12 over and refer back to the guides made with the flanges. Drill the pilot holes in the center of the circular guides. Ready the screws.

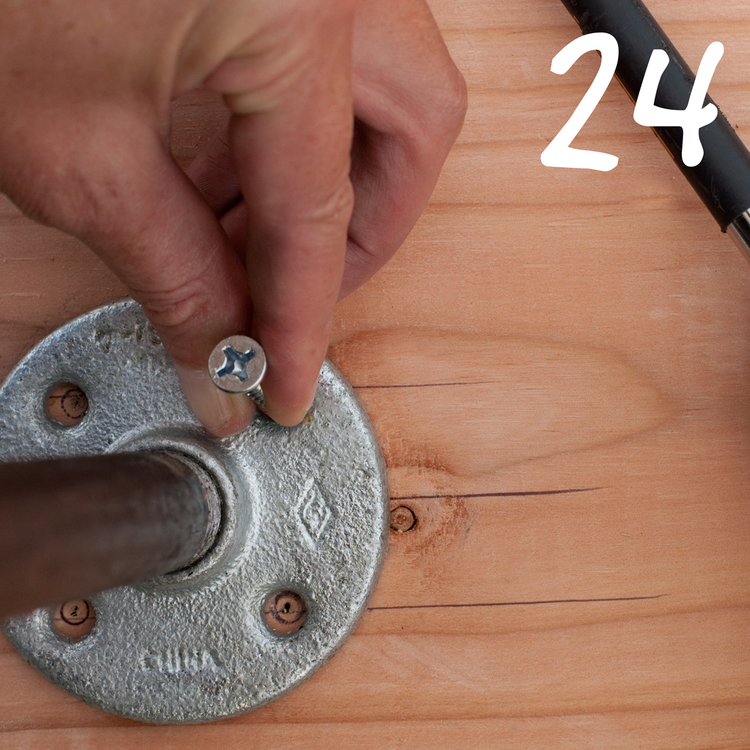
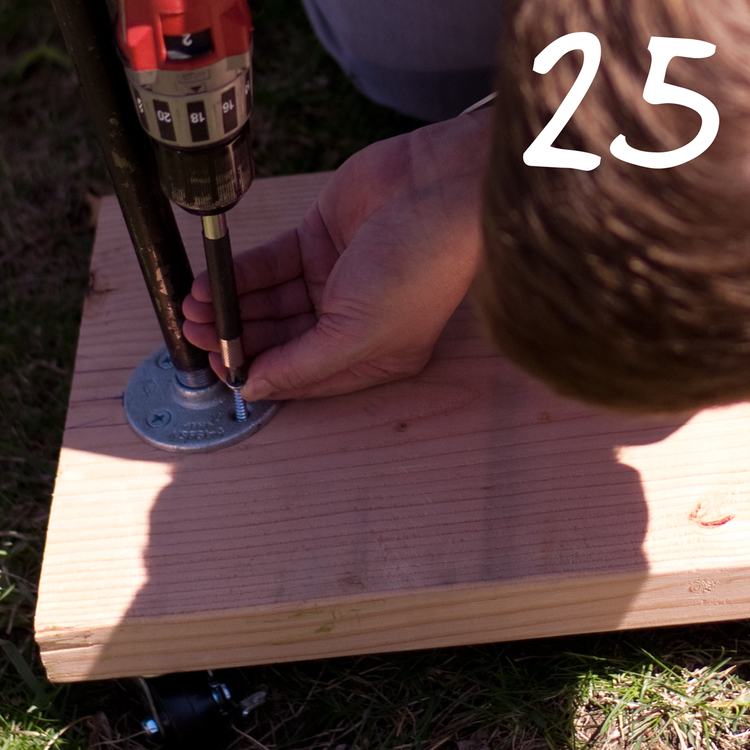
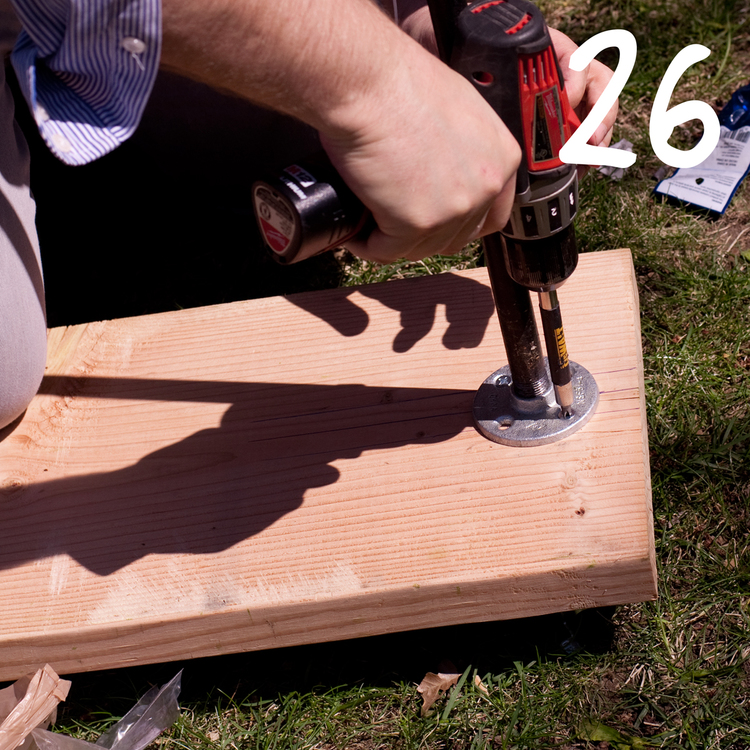
23: Return the flange to the end of the steel pipe it was removed from in step 7. With an assistant's help, place the assembled steel pipe rack system over the flange guides. 24 & 25: Screw the flanges to the 2X12 using the pilot holes created in steps 20 & 21. 26: Screw the second flange in place using the guides AND YOU'RE FINISHED!

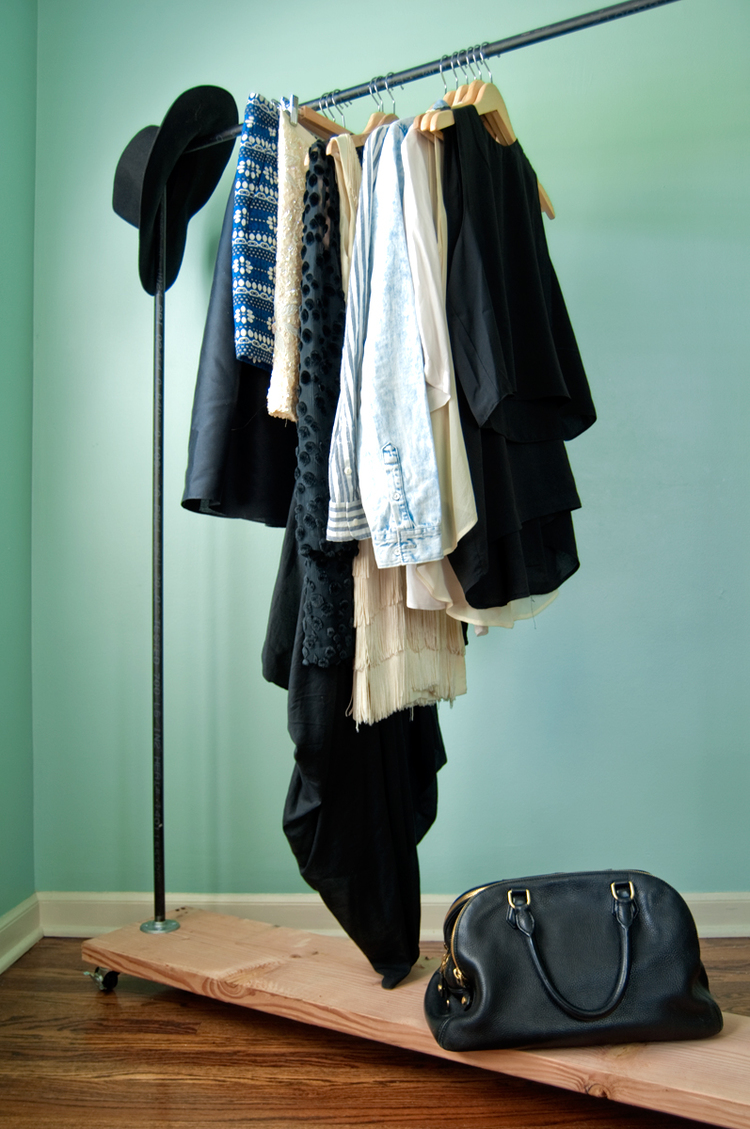
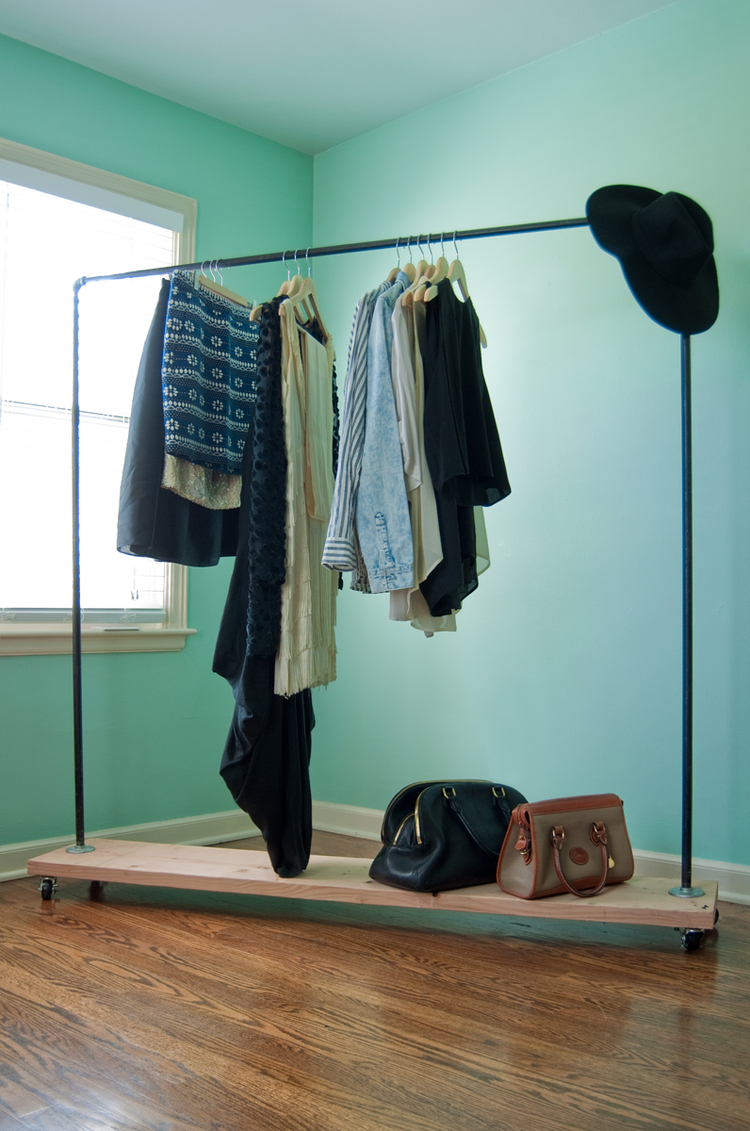

I left the wood raw - party as an aesthetic choice - mostly because I was an insane hurry to unpack my clothing. This piece is incredibly sturdy and provides an enormous amount of hanging space. And unlike built in closet systems, I can take it with me or sell it when I move.
I'd love to see photos of your own DIY wardrobe rack projects - post hyperlinks in my comments section!